I stumbled upon backyard beekeeping when I brought my son to visit his classmate. It’s simply amazing! To keep my own backyard bees, I’ve done a lot of research.
Backyard beekeeping may seem overwhelming, as you are dealing with thousands of flying and stinging creatures. There are also many other things to consider. But, it is not as difficult and complex as you thought, and it is a rewarding hobby.
In this article, I will share everything you need to know to start a beehive at your backyard and maintain your backyard hive.
Do check out my recommended book and supplies for beekeeping! Be sure to visit American Beekeeping Federation if you are in the US for more beekeeping-related resources and news.
- Getting Your Bee Starter Colony
- Tools Required for Beekeeping
- How to Set Up the Beehive
- Transfer the Bees into the Backyard Beehive
- Donning the PPE
- Quenching the Thirst
- Learn How to Use the Smoker
- Tending Your New Backyard Beehive
- How to Handle Bees and Avoid Getting Stings
- How to Handle Bee Stings
- Final Words
Getting Your Bee Starter Colony
Obviously, you need the bees to start beekeeping. You can either buy them from your local beekeeping suppliers, apiary, or even catch a swarm if you are skilled enough. Note that there are several bee stocks or breeds for you to choose, each with different characteristics.
The easiest way to get a bee starter colony is buying a bee package. A bee package contains the queen and workers, which are all you need to start a hive. It is easy and convenient, because the bee package can be sent from any apiary to your doorstep.
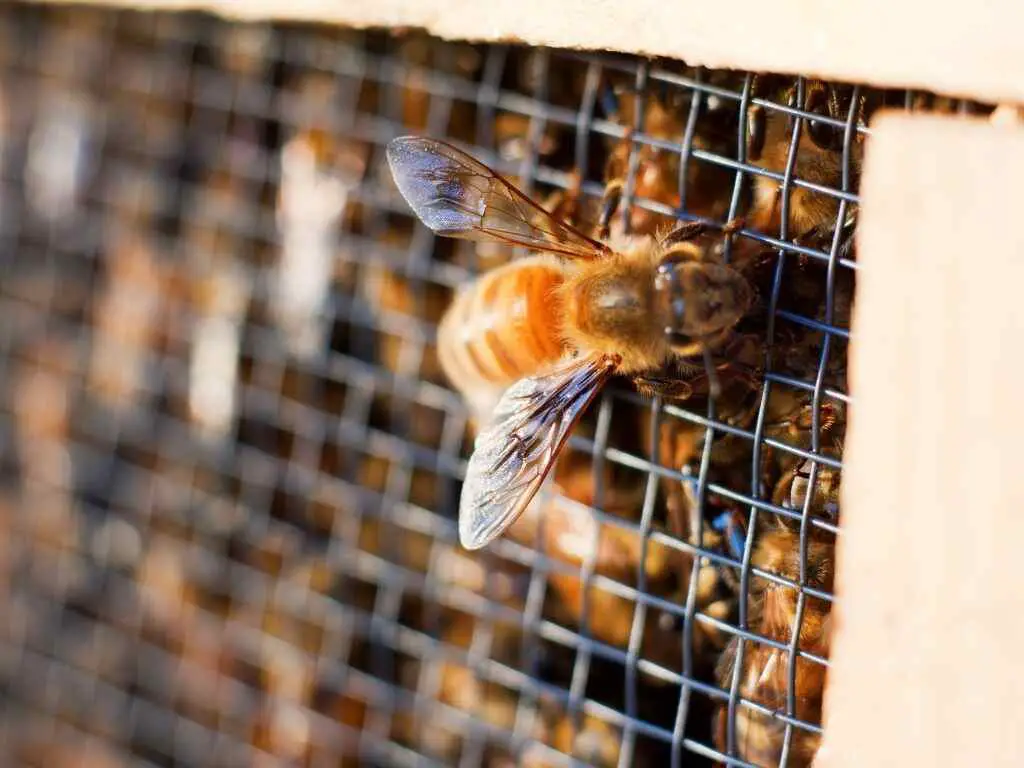
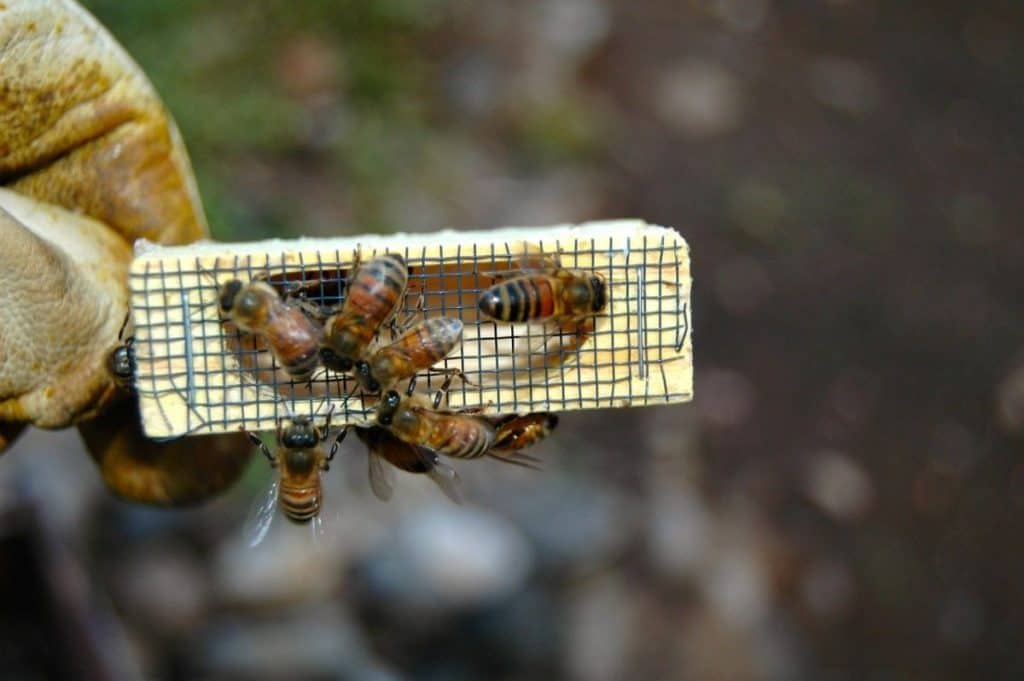
Inside a bee package, the workers are usually housed in a container with see-through mesh, while the queen is housed in a smaller queen cage. Bees package is the easiest option for most people.
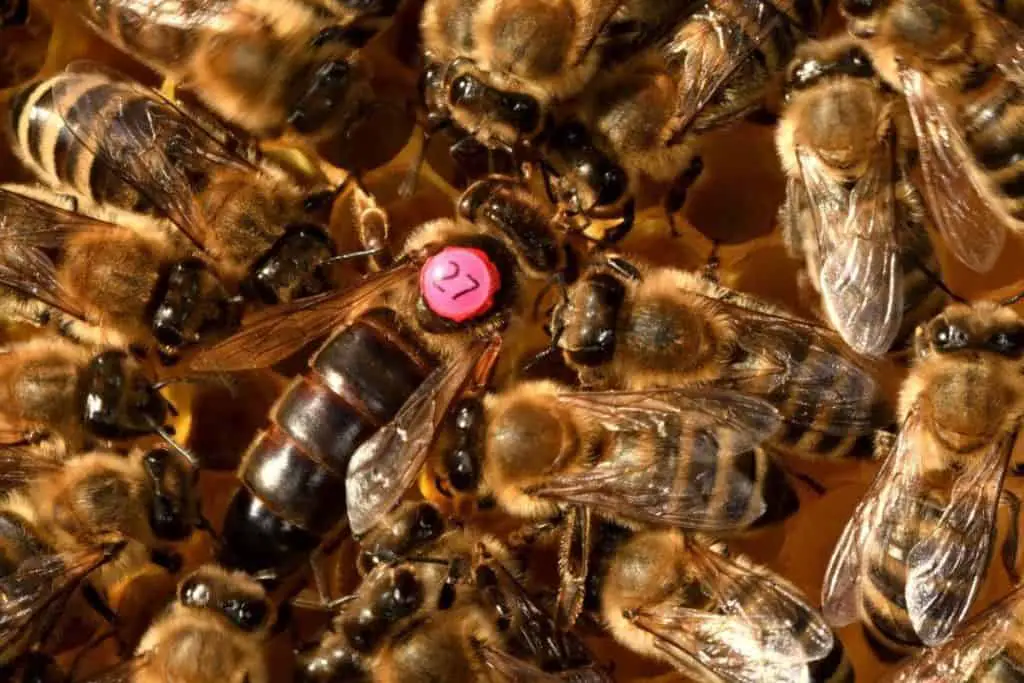
You can opt for a marked queen, so it is easier to identify her when she is surrounded by other bees. At the later stage, you can also easily know whether your queen has been replaced by a new queen through the marking.
The issue with packaged bees is the stress during the transit, which may take several days. Some of the bees may not survive the process. Make sure you choose a supplier that offers free replacement if the queen died in transit.
On top of bee packages, you can buy a nucleus colony or an established colony.
If there are any apiary or local bee stores nearby, you might be able to get a nucleus colony. Nucleus colony is a small colony of bees. When you buy a nucleus colony, you simply transfer the beeswax frames that have the brood and bees into your hive, together with its queen of course.
Bees from the nucleus colony are healthier than the packaged bees since they don’t experience the stressful mailing process. It is likely that they will continue to flourish since there is already a foundation. It is not easy to find people selling nucleus colonies though.
Another option is to buy a fully established colony. Simply buy the whole hive from a local apiary. You will be able to check the condition of the colony and choose the one that you like the most. You also don’t have to worry about the survivability of the hive since the colony is well-established.
However, I don’t recommend any beginners to buy a fully established colony. This is because a fully established colony has a lot of bees, often too much for a beginner to handle. Moreover, you will miss the opportunity to observe and learn how bees establish their colony.
Here are 2 things to consider when choosing your bees supplier:
- Reputation and year in business
Choose a reputable supplier that has been in the beekeeping business for years. Such suppliers treasure their reputation and often offer better quality colony and customer service. You can get that information online or from the local/regional beekeeper associations.
- Replacement and warranty policy
Your bees may die in transit. Choose a supplier that can replace the queen if she dies in transit, or if she is infertile.
You can also get your “free bees” if you are experienced and well-equipped to catch a swarm. Beginners shouldn’t attempt to do that, though. First, it is dangerous. You might provoke the bees and get attacked. Second, it is difficult to identify the breed of the swarm. You might be hitting a swarm of Africanized bees! Lastly, you have no idea about the health of the swarm.
The best time to start beekeeping is in early spring. That way, you can enjoy a full year of harvest. No point starting a colony in the summer or autumn, because most likely it won’t survive the winter. Because of that, you should start ordering your bees in the winter, so that you can receive them in spring.
Make sure you get your hive ready before you receive your bees. Otherwise, you won’t have any place to house them. Your bees will die if you cannot house them timely. I recommend getting a Langstroth hive for your bees (learn more about Langstroth hive).
Tools Required for Beekeeping
Other than the hive and bees, you will need some tools to help you in handling your bee colony. Make sure you have these tools ready by the time you receive your bees!
Smoker
The smoker is the most important tool that you need for beekeeping. A smoker generates smoke by burning wood, wood pellets or hemp twine. Bees are calmed down by the presence of smoke. That allows you to work on the hive with ease.
Hive tool
Most of the time, you will be holding the hive tool when working on the hive. You need it to scrap the propolis, pry open the hive, manipulate the frame, etc.
Frame rest or hook
You will be working with multiple frames, and you need to place them somewhere while working on a particular frame. This is where the frame rest or hook comes into the picture.
Personal protection equipment (PPE)
While bees are docile, they can be curious. They like to fly towards and land on your face, nose, ears, etc. And when you mishandle them, they might sting. That’s why it is a must to wear PPE. The standard PPE you need is a veil, bee cloth, bee gloves, and high cut boots.
Soft bristle brush
The bees will climb around the comb, and you can brush them off with a soft bristle brush so that you don’t injure them.
Microfiber cloth and alcohol
When you deal with honey and propolis, your gloves get sticky. You can clean your gloves using a cloth and some alcohol. That will prevent you from making everything else sticky.
How to Set Up the Beehive
To set up your beehive, simply follow the manufacturer’s instructions. For the purpose of this guide, I assume you are using a Langstroth hive.
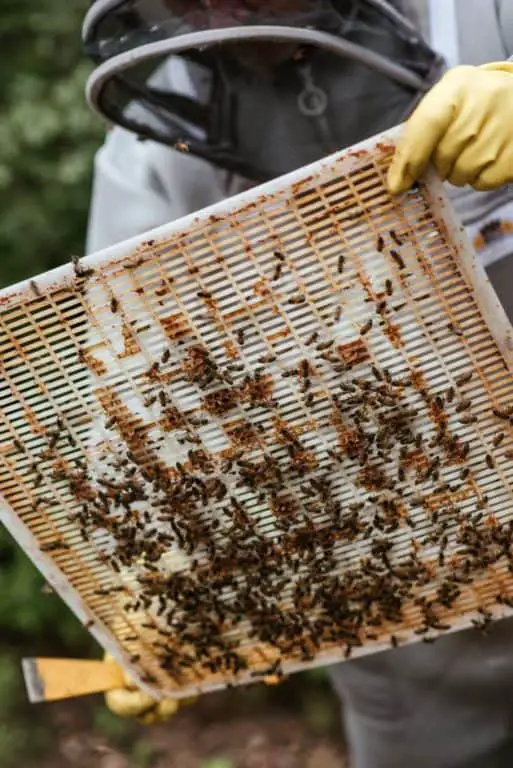
You don’t have to put in the queen excluder and super in the initial setup. Those should be added only after the hive body is almost full of honey.
Pay attention to the inner cover and bottom board, so that you install them in the correct orientation. The depressed side of the inner cover and the opening of the entrance reducer on the bottom board should face upward. You should use the smaller entrance on the entrance reducer for your new bee colony.
The hive should be placed on solid and even ground, on an elevated hive stand. By using an elevated hive stand, you can ward off some pests. You can also set up oil moats at the legs of the hive at a later stage if your hive is attacked by ants. Moreover, you won’t have to bend over when working on your hive.
Avoid putting the hive close to and facing the pedestrian walkway, your front door or your neighbors’ house. Otherwise, the bees may hit someone when flying in and out of the hive. Don’t put it too close to your neighbors’ properties to avoid complaints.
The beehive should be away from direct and full sunlight, so it doesn’t become too hot in the summer. You can put it under a partially shaded location. Point the front of your hive towards the east, so that your bees wake up and start their work earlier.
Ideally, you want something such as a fence or wall behind your hive to reduce excessive wind which may stress the colony. At the same time, you will need the place to be well ventilated. Make sure there is enough space around the hive so that you can comfortably work next to the hive (eg. inspection, harvest etc.).
If you want, you can paint the hive to match the background color, so it is less conspicuous. Consider putting a sign board to warn visitors from disturbing the hive.
Transfer the Bees into the Backyard Beehive
The first challenge in starting a beehive is to transfer your newly purchased bees into the intended backyard beehive. For a new backyard beekeeper, this can be a first-time experience of handling bees directly. While it might seem intimidating, the key is to stay calm and follow the process step by step.
The best time to start a bee colony is early spring. If you do it too late, your bee colony may not be able to get themselves ready enough to survive winter. If you start too early, the weather is simply not right.
Once you get your bee parcel, you need to first de-stress the bees ASAP. Put the parcel in your house, somewhere cool. Mist the bees with water using a garden sprayer. That should cool them down. Then, mist them with 50% syrup (eg. 1 lbs of sugar dissolved in 1 lbs of water).
You will see some dead bees at the bottom of the container. That’s OK, as long as the majority of them survived. Of course, the queen must be alive.
You can start housing your bees in late afternoon or early evening. Bees are less active during this period than noon. So, it is easier to handle them.
Choose a time when there is no wind and no rain. If the weather conditions are not favorable, do it on the subsequent days. The bees can survive as long as you mist them with syrup. Having said that, do introduce them to the hive ASAP.
Before you start, remember to don your PPE (more on donning PPE later). You will not need the smoker for now, since the bees are not as defensive. You will need the hive tool, a garden sprayer with 50% syrup, and 0.5 gal (~2 L) of 50% syrup for the hive top feeder.
When you are ready, open the package. Take out the feeder tin and the queen cage, and immediately cover the parcel. You can also tuck a cloth onto the opening of the parcel, which is faster. It is OK if some workers escape.
See if the queen is still alive. If she is dead, get a replacement queen and wait until you get the new queen before you introduce the bees into the hive.
If the queen looks OK, you can proceed. You should notice a plug on the queen cage. Remove the plug and you can see an opening, which is blocked by a candy plug. If the candy has been consumed before you house the queen into the hive, replace it with a marshmallow. Remove the anti-mite strip, if present.
The queen and the workers in your bee parcel are likely not from the same colony. The new queen needs some time to exert her control over the workers. If she fails, she will be torn apart by the workers.
The little candy blocks the opening of the queen cage, so that bee workers cannot immediately access the queen. This will buy her some time to take over the colony through her pheromone. By the time the candy is consumed by the queen and/or workers, she should already have full control over the colony.
Take out 5-6 frames from the hive body. Make a hook using paper clips. Hook the queen cage vertically in between 2 frames. Then, pry the bee parcel open and pour the bees into the empty space created from removing the frames earlier.
You may need to shake the parcel a little bit. Once most workers are outside the parcel, put back the frames.
Cover the hive with the hive top feeder. Top up the hive top feeder with 50% syrup. Since you will be inspecting your hive on a regular basis in the initial stage, you don’t need to pour too much syrup. Otherwise, it is difficult to remove the feeder without spilling the syrup.
Cover the feeder tray with the outer cover, and you are done! If you stay at somewhere with raccoons, it’s good to put something heavy (eg. a brick) on the outer cover so that it can’t be easily removed by raccoons.
Donning the PPE
You should always wear full PPE when working on the hive. Here’s how to wear them.
Start by wearing the bee cloth coverall. Remember to zip it! Then, wear your high cut boots. Pull the trousers cuff over your boots. Use a cloth tape to seal the cuff over your boots, so that no bees can go in!
Then, put on your veils. Check and make sure all potential entries are covered. Lastly, put on your gloves. Cover the gloves with the sleeve cuff (or the other way round). Again, use cloth tape to seal the cuff.
You are now ready to rock and roll!
Quenching the Thirst
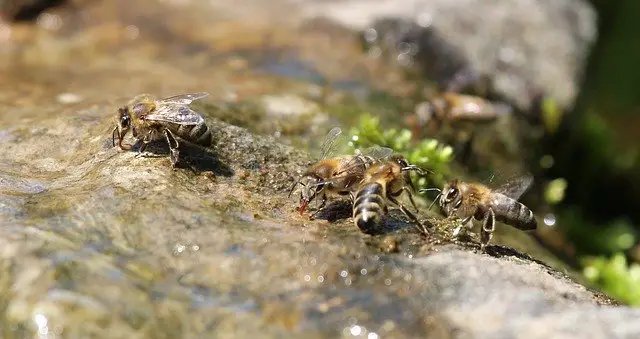
Like all living creatures, bees need water to survive. They also use water to dilute honey and regulate the hive temperature.
If you are using a hive top feeder, you can pour water into the feeder tray. That gives your colony the easiest access to water.
You can also put a shallow tray with water outside the hive. If the tray is too deep, the bees may drown. Put some stones or pebbles to level the tray. The only issue with a shallow tray is that it dries quickly.
Another option is to use a bucket. Put something that floats (such as foam) in the bucket, so that the bees can safely land to collect water. You can drill 2 drain holes at the side of the bucket, close to the top, so that rain doesn’t wash away the foam.
Whether you are using a bucket or tray, make it close to your hive. Otherwise, your bees may trespass your neighbors’ properties to collect water.
Learn How to Use the Smoker
After you have set up your colony, it’s time to learn how to light up your smoker and keep it lit!
The key is to keep the fire burning by having enough fuel. You don’t want to run out of smoke while handling your bees, and you don’t want to spend your time in a coverall under the hot sun, trying to figure out how to light up the smoker.
To light up the smoker, simply pack it with fuel. You can use hemp, wood pellets or wood flakes.
Burn the fuel and slowly puff the smoker. Once you get a thick smoke, close the smoker and puff it again for a few times. You should get a thick, white, and cold smoke that lasts you at least an hour.
Here’s a video on how to do that.
Once you know how to use the smoker, you are ready to work on your beehive.
Tending Your New Backyard Beehive
Since your beehive is new, visit it once every 2 weeks to ensure everything is alright. You can also use this opportunity to observe the behavior of your bees. As your hive grows stronger, reduce the visit frequency to minimize disturbance. Remember, disturbance makes them less productive.
Sunny day is the best time to visit your hive, because most bees will be out for work. You won’t be overwhelmed by their numbers.
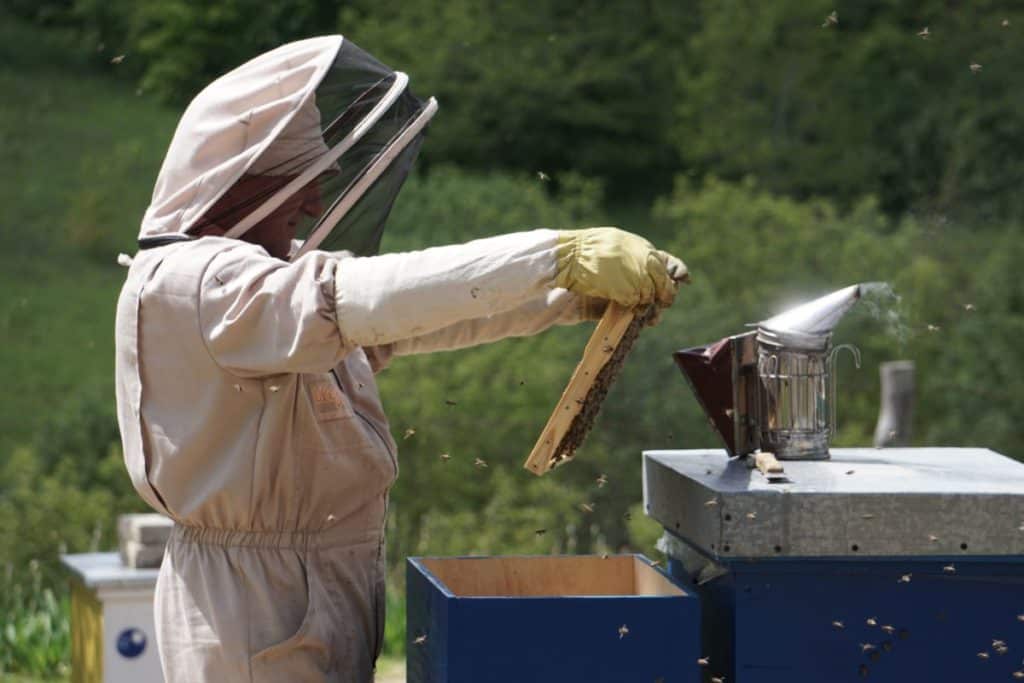
Before you work on your hive, make sure you have gathered all the tools you need. Light up your smoker and keep some fuel and a lighter nearby. It is very troublesome to search or prepare for stuff after you have donned your PPE.
Week 2: First Visit
Your first visit to your bee colony should be around 2 weeks after you housed them. Before you open the cover, puff some smoke into the hive through the entrance. The smoke will calm the bees down, perhaps by distracting the bees or masking their alarm pheromones.
After that, remove the cover and the hive top feeder. Puff more smoke into the hive. With the help of your hive tool, slowly remove the frames.
Check whether the queen has left the cage. Is she still alive? Is she laying eggs? You should see the eggs and larvae inside the cell.
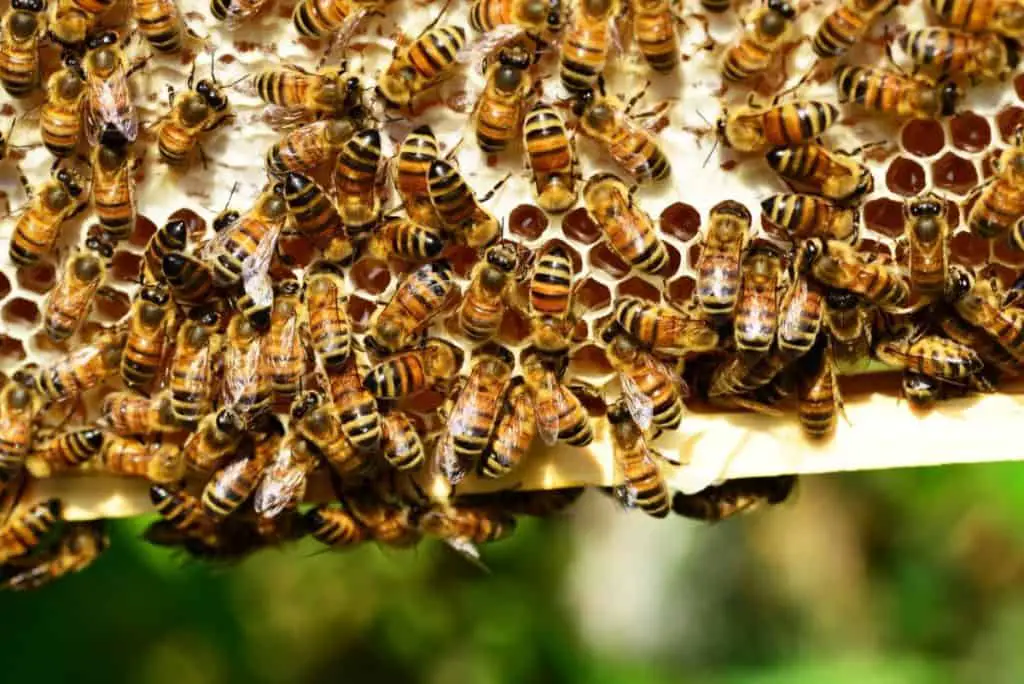
One side of a frame should be almost fully filled with honeycomb, which indicates your bees are productive and healthy.
If the queen is dead or not laying any eggs, get a replacement queen ASAP.
Remove the queen cage, together with any burr comb built around the queen cage. Because the queen cage was placed between 2 frames, it creates a gap larger than the bee space, and hence the bees may build burr combs in that space.
Take this opportunity to recap on what you have learned from your study on bees’ biology. Can you identify the capped brood comb? Can you find the capped and uncapped honey? Can you differentiate the tan, protruded, capped brood cells from white, indented, capped honey cells? Can you see the propolis and pollen?
Remember to puff some smoke to your hive from time to time as you work on your hive. You should always stand at the side of your hive, so that you don’t block the incoming and outgoing bees.
Once you are done, puff some smoke into the hive again. Carefully reinsert the frames and cover your hive. Top up the syrup if required.
Week 4: Second Visit
Inspect your hive again in the 4th week. Similar to the previous visit, check whether your brood is expanding, scrap propolis and wax off the frame. You can stop providing syrup from now on.
Pay special attention to the presence of any supersedure cell. The supersedure cell looks like an unpeeled peanut. It hangs vertically on the surface of the comb.

The presence of a supersedure cell signifies a weakened queen. The workers are trying to raise a new queen to replace the old queen, because they think the existing queen is not fit enough. This normally happens when the queen is old or if she is sick.
Having said that, it is common to see workers building supersedure cells when a new queen is introduced. It doesn’t mean the queen is not fit enough, though.
When you see supersedure cells at this stage, you either get yourself a new queen to replace the old queen, remove the supersedure cells or do nothing.
By replacing the queen, you speed up the process of supersedure, so that your hive gets a healthy queen and can return to its normal operation faster. If the existing queen is healthy and growing strong broods, removing the supersedure cells prevents disturbance in your bee colony. If you choose to do nothing and the existing queen is fit enough, she will destroy the usurpers.
There is no right and wrong practice on treating the supersedure cell. Just follow the option that you are most comfortable with. Remember to check out my guide if you want to learn more about replacing a weak queen.
Week 6: Third Visit
Continue to inspect your hive in week 6. If everything went well, most frames should be fully occupied with honey comb. You can now install an additional layer of hive body, so that your colony has more space to expand.
See if you can find any swarm cells. Those cells resemble unpeeled peanuts, and they hang vertically, much like the supersedure cell. The presence of swarm cells indicates a stressful environment.
It is unlikely for you to see swarm cells in your first year, though, because the colony is still young. But if you see them, remove the swarm cells and improve your hive’s conditions (space, ventilation and temperature).
Switch to the larger entrance (of the entrance reducer) to improve ventilation. That will also allow your bees to move in and out faster.
Start paying attention to symptoms of diseases, such as sunken and perforated brood caps. Honey bees are susceptible to several diseases. Treat them immediately once you see symptoms of diseases. Refer to this post for more details on bee diseases, prevention or treatment.
Week 8 onward: Fourth and Subsequent Visits in Summer
If everything goes well, most of the frame in both hive bodies should have been fully built by your colony. It’s now time to add a shallow super.
Remember to put the queen excluder between your hive body and super. When your super is almost full, add another super on top of it. You might only need 1 super for the first year, though.
You can now remove the entrance reducer. Your colony should be strong enough to protect themselves at this stage. This would further improve ventilation in your hive in the hot summer. However, if you notice signs of robbing at your hive, quickly put back the entrance reducer.
Continue checking whether your queen and brood are healthy, and take measures to prevent swarms.
If 80% of a frame (in the super) is filled with capped honey, it is ready for harvest. You can either harvest frame by frame whenever an individual frame meets the condition, or harvest all in one go when 80% of all frames are filled with capped honey. Learn more about harvesting honey here.
How do you differentiate capped honey from capped brood cells? Capped honey cells are white and slightly indented. Meanwhile, capped brood cells are tan and slightly protruded. Note that newly capped brood cells may look whitish. If you are using a queen excluder, there are only capped honey cells in the super.
Remember, you should only harvest the honey from the super!
Tending the Beehive in Autumn
When the temperature gets cooler in autumn, the activity of your hive goes down. The colony may even reduce in size.
Check whether the hive bodies have enough capped honey. At least half of the honeycombs in your hive must be filled with capped honey. If you are staying in places with a long winter like Alaska, you want all frames filled with capped honey.
What should you do if there isn’t enough capped honey for winter? You can feed your beehive with syrup in the autumn to increase their chance of survival. Instead of 50% syrup, increase the amount of sugar to 60% (ie. 3 portions of sugar to 2 portions of water in weight).
Note that you should start feeding them ASAP, because they will stop feeding when it gets too cold. Once they stop feeding, remove the hive top feeder and put back the inner cover.
Autumn is also the best time to medicate your bees. Simply add the antibiotics or whatever medicine you intend to use into the syrup to medicate your bees.
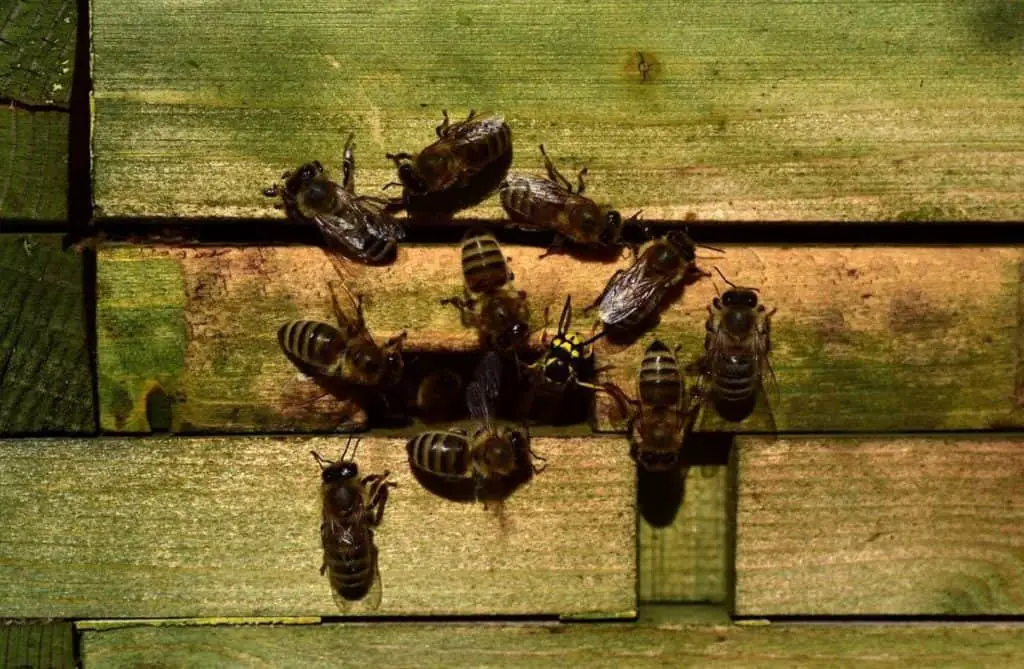
Keep an eye on potential robbing that may happen to your hive. Nectar is now scarce and the wild bees would seize any opportunities to rob your hive. More information on hive robbing can be found here.
You may want to install a metal mouse guard (affiliate link) at the hive entrance to prevent mice from entering your hive.
Again, keep your hive ventilated. Ventilation is important to prevent condensation in the hive. Cold water inside the hive can kill your bees.
Tending the Beehive in Winter
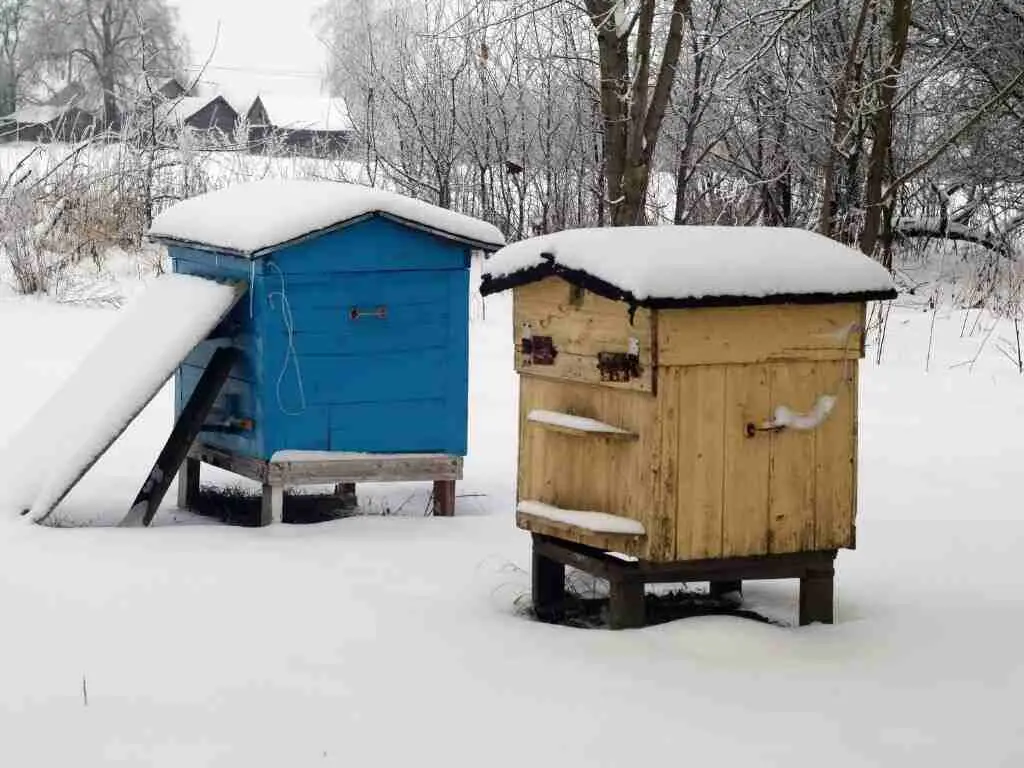
There isn’t anything much that you can do in the winter. Just keep an eye on your hive and remove anything blocking the entrance.
Do not open up your hive until winter is about to end. Your bees are doing their best to keep themselves warm. Opening the hive will only expose them to cold air and thwart their effort.
When winter is almost over, take a peek inside your hive on a day with clear weather. Without removing the frame, see if your bees are still alive. Some of them probably didn’t survive the winter, but the colony should propagate once the winter is over.
Start feeding your bees with syrup in late winter when it gets warmer. Chances are, their food is almost depleted. Feeding them will ensure their survival and give them a quick start in spring. Take this chance to medicate your bees, if needed.
Once you start feeding, you must continue feeding until the bees can collect pollen.
A New Year Cycle
Spring is finally here and your bees are ready to take care of themselves. Remove the feeder once they start to collect pollen.
Unlike the first year, you don’t need to put in the entrance reducer. Place the super around 4 weeks after you stop medicating the bees. You can now cut the visits to your hive to half.
How to Handle Bees and Avoid Getting Stings
Honey bees have a stinger. Even the gentlest honey bee would sting when provoked. As a beekeeper handling thousands of bees, you want to ensure you are protected.
Always be gentle and careful when handling the bees. Honey bees do not sting if they are not provoked. Using the right tools and equipment when working on your hive can also reduce the risks of getting stung. Most beekeepers would work on their beehive on a sunny day, when most of the bees are foraging.
The curious bees will always fly around you, and even land on you when you are working on their hive. You can gently push away the bees if they block your way. If a bee finds her way into your clothing, just walk away from the hive and carefully remove the bee. Don’t panic and swat the bees. Otherwise, you will be in trouble.
When you need to handle your bees, it is best to wear PPE and use the smoker. Wearing PPE properly gives you 100% guarantee that you won’t be stung. On the other hand, the smoker makes your bees less aggressive. Make sure you learn how to use them correctly.
Bees love the sun. On a sunny day, most bees will go out foraging. This makes it easier to work on your hive, because it is not as crowded. You won’t be overwhelmed by their numbers when handling the hive. The less mistakes you make, the less likely you get stings.
How to Handle Bee Stings
If you got stung, apply antihistamine cream or take an antihistamine tablet to relieve the pain and allergy reaction. Don’t apply grandma remedies, because it may worsen your situation.
Certain individuals may experience severe allergic reactions, also known as anaphylaxis towards bee sting. If you suspect you have anaphylaxis, consult your doctor and get an epinephrine auto-injector for emergency use.
Final Words
Backyard beekeeping is a complex hobby. Make sure you spend enough time to learn about beekeeping before you start a beehive in your backyard. If you want to become a successful backyard beekeeper, do check out my collection of backyard beekeeping articles!
If you find this guide useful, do share it with your friends!