Welcome to the fascinating world of ant keeping! If you’re here, chances are you’re intrigued by the idea of keeping these industrious little creatures as pets. I remember when I started—it was equal parts excitement and confusion. With so much to learn, I wished someone had handed me a comprehensive, step-by-step guide. Well, guess what? That’s exactly what you’ll find here.
Whether you’re catching your first queen or setting up a formicarium, this guide has you covered. Let’s get started on your journey to becoming a proud ant-keeper!
- How to Get Your First Ant
- Starting Your Ant Colony
- Transitioning to a Formicarium
- Transferring the Colony to Ant Farm
- Caring for Your Ant Colony
- Leaving Your Ants When You’re Away
- Recommended Supplies
- Final Thoughts
- Setting Up the Formicarium
- Easiest and Cheapest DIY Ant Farm
- Caring for Ant Farm
- Caring for Your Ant Colony when You are Away from Home
- Recommended Supplies
How to Get Your First Ant
Starting your ant colony begins with one big question: Should you catch a queen or buy one?
Buying vs. Catching
- Buying a Queen: The easiest way to get started. Many sellers offer a variety of species, and you’re less likely to end up with a non-fertile queen.
- Catching a Queen: A fun and rewarding option but requires patience, knowledge of local species, and some luck. Try to catch a few of them because some might not be fertilized yet.
How to Catch a Queen Ant
Catching a queen isn’t just an adventure—it’s a chance to learn about ants in the wild. Here’s how to do it:
- Timing is Everything
Queens are most active during their nuptial flights, which usually happen on warm, windless days after a summer rain. Check formiculture.com for nuptial flight schedules in your region. - Where to Look
- In apartments or condos: Check walls, stairways, and balconies after rain. Alates (winged ants) are often drawn to building lights.
- In landed properties: Turn on your porch lights or use a temporary blacklight. Be cautious, as this can attract other insects too.
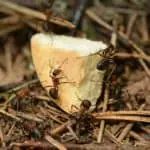
- Spotting the Queen
Queens are larger and stouter than males, with elbowed antennae and a slender waist. If she’s dropped her wings, even better—she’s likely already mated! - Capture and Store
Use small vials to collect queens. Keep them separate to avoid fights and ensure you don’t mix species.
Pro Tip: Always double-check that your “queen” isn’t a termite. Termites have straight antennae, a broad waist, and equal-sized wings.
Buying a Queen
If catching isn’t your thing, purchasing a queen or starter colony is a fantastic alternative. Local stores and online sellers often provide detailed care instructions for your chosen species.
Tips for Buying:
- Choose beginner-friendly species.
- Ensure the queen is fertile.
- Avoid exotic species that could harm your local ecosystem if they escape.
Starting Your Ant Colony
Your new queen deserves a cozy home to kickstart her colony. Here’s how to set up her new digs:
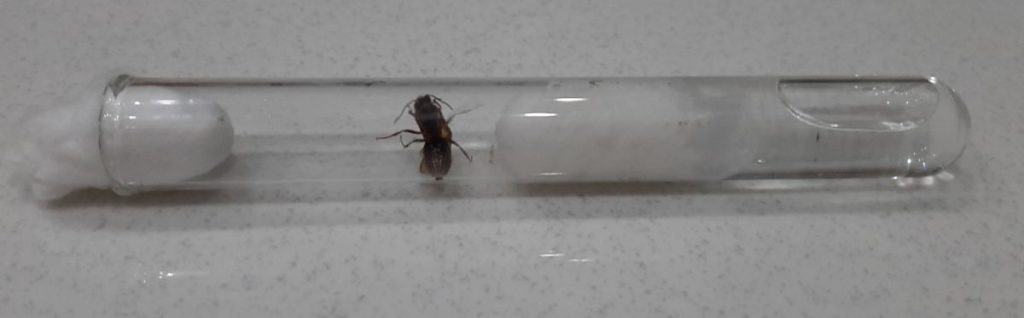
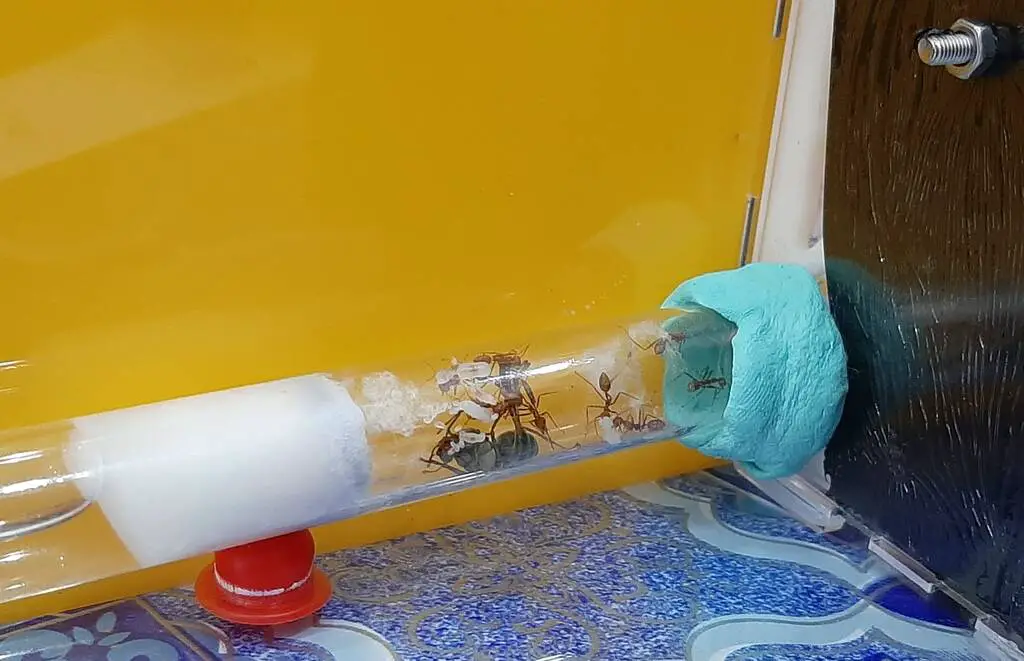
The Test Tube Setup

The simplest and most effective setup for a queen ant is a test tube:
- Fill half the tube with water.
- Plug the water section with a cotton ball, ensuring it stays moist but doesn’t leak.
- Place the queen inside and seal the tube’s opening with another cotton ball.
- Keep the tube in a dark, undisturbed place.
Depending on species, some may lay eggs in weeks while some may take up to 2 months. If the queen does not lay any egg in 6 weeks, it is safe to assume that they have not mated in the nuptial flight. You can release or euthanize them.
Do not check out the queen unnecessarily. When you need to check or handle the queen (feeding etc.), make sure you are gentle and prevent too much disturbance so that the queen does not feel stressed. Otherwise, she may not lay any eggs, or she may even kill all her broods. Ensure water is always available for the queen.
Fully-Claustral vs. Semi-Claustral Queens
There are 2 types of ants which you might have, the fully-claustral and semi-claustral ants.
- Fully-Claustral Queens: These queens store enough energy to survive without food until their first workers (nanitics) emerge.
- Semi-Claustral Queens: These queens need regular feeding, especially protein, to lay eggs and thrive.
Not sure which type you have? Start with the semi-claustral setup to be safe.
Fully-claustral Queen
A fully-claustral queen is bulkier in size and has a fat abdomen because she needs to store enough energy to survive until the first batch of workers (called nanitics) comes out. Many common ants species are fully-claustral.
When the queen has around 10 nanitics, you would want to start feeding them with protein food (eg. cricket leg and boiled yolk) at least once a week. To do that, put the food on a tiny aluminum foil or magazine paper and carefully place it into the test tube.
Do not leave any unconsumed in the tube overnight, or it may promote molds. If there is any food spillage onto the test tube call, carefully clean it with wet cotton.
Semi-claustral Queen
Semi-claustral queens are smaller compared to fully-claustral queens. Although slightly bigger in size, they resemble their workers. In semi-claustral ant, the queen does require food, especially protein.
Prepare the test tube in the same manner as what you would do for a fully-claustral queen. However, instead of covering the test tube with a cotton, place the tube into another covered plastic container with a few small pieces of tissue paper.
Feed the semi-claustral queen with protein food such as a cricket leg/raw tuna/peanut butter twice a week. Remember to put the food onto a sauce plate so that you can easily remove it if it is not fully consumed after a day.
Similar to fully-claustral species, keep this setting in an undisturbed dark place. In any case, if you are not sure if your queen is semi- or fully-claustral, you can follow the semi-claustral setup.
Depending on species, some may lay eggs in weeks while some may take up to 2 months. If the queen does not lay any egg in 6 weeks, it is safe to assume that they have not mated in the nuptial flight. You can release or euthanize them.
Do not check out the queen unnecessarily. When you need to check or handle the queen (feeding etc.), make sure you are gentle and prevent too much disturbance so that the queen does not feel stressed. Otherwise, she may not lay any eggs, or she may even kill all her broods. Ensure water is always available for the queen.
Cleaning and Maintaining the Starter Colony
Sometimes, the cotton in the test tube may get moldy, or the water in the test tube gets dried up. If you are using a semi-claustral ant setting, simply insert another test tube with water into the container.
For a fully-claustral setup, first you need to prepare another set of test tubes with water. Remove the cotton in the old test tube and gently place both of the test tubes with their openings facing each other.
Use a tape to join both the test tubes. Then, wrap the new test tube with a cloth to keep it dark while you leave the old test tube under a bright environment.
Leave it there for a few hours, and you will see the ants slowly moving to the new test tube because it is darker there, which makes them feel safer.
Transitioning to a Formicarium
Once your colony grows to about 20 workers or the test tube becomes too crowded, it’s time to move them into a formicarium (ant farm).
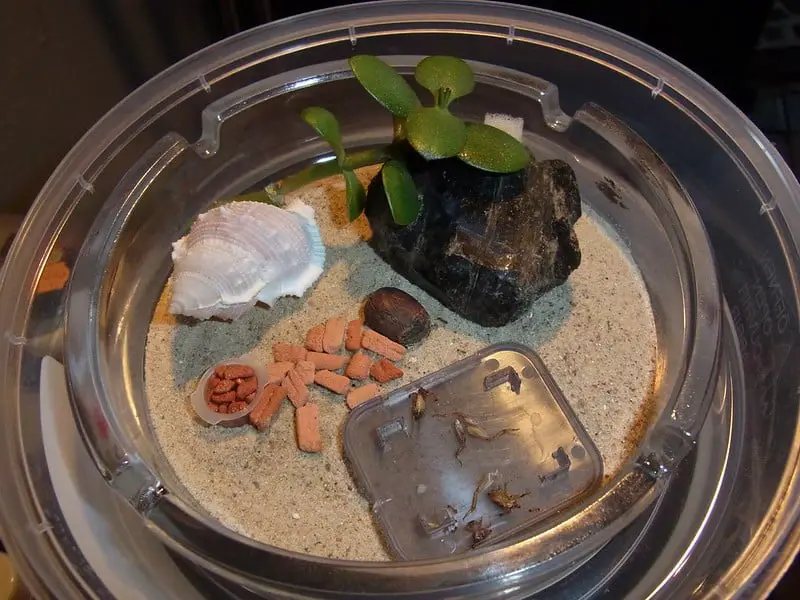
What is a Formicarium?
A formicarium is a specialized habitat for your ants, consisting of:
- Nest: Where the ants live and lay eggs.
- Outworld: A space for foraging and exploring.
Types of Ant Nests
When transitioning your ant colony to a permanent home, choosing the right type of nest is critical. The nest serves as a safe haven for your ants, providing shelter and the ideal environment for growth and development. There are two main types of nests: Privacy Nests and No-Privacy Nests, each catering to different preferences and needs.
1. Natural-inspired Nests
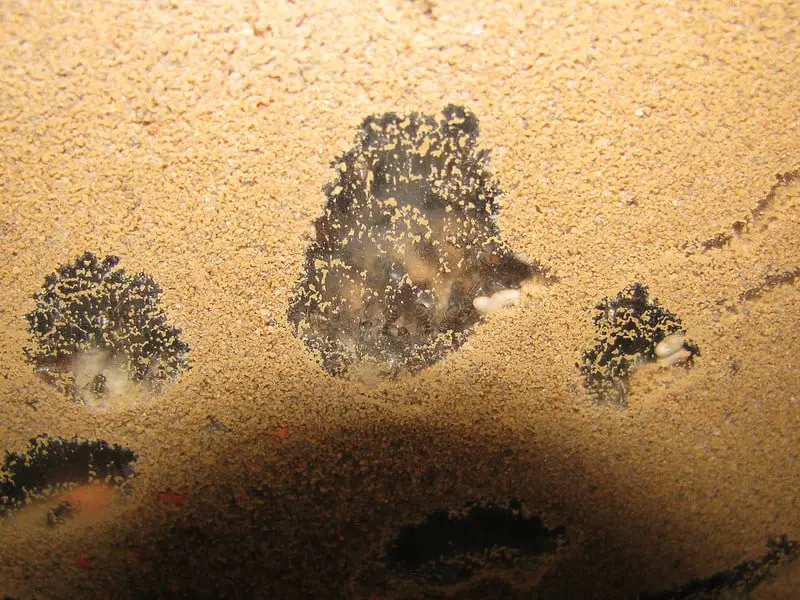
These nests replicate a natural habitat by offering a dark, secluded environment where ants can build their own tunnels and chambers. They are typically made using soil, sand, or other substrates.
Pros:
- Closest to natural conditions, making ants feel comfortable and secure.
- Easy to DIY with basic materials like jars or boxes filled with substrate.
- Encourages natural behaviors like tunneling.
Cons:
- Limited visibility: You can’t see what’s happening inside the nest.
- Difficult to monitor colony health or clean.
- Ants may relocate unexpectedly within the substrate.
Best For: Hobbyists who value natural setups and don’t mind less visibility.
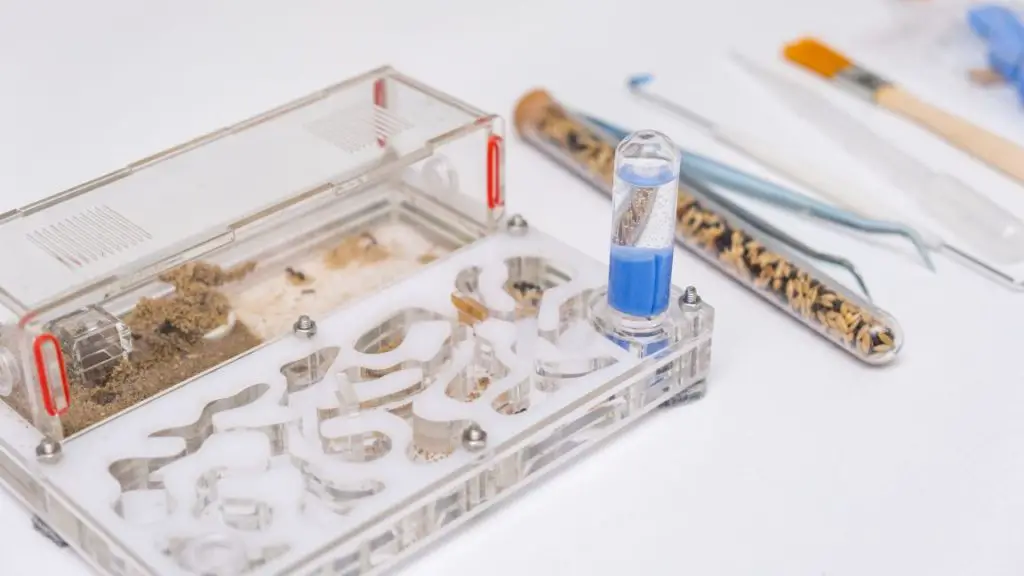
2. Visible, No-Privacy Nests
These nests are designed for observation, with pre-built tunnels and chambers made of transparent or semi-transparent materials. Common materials include acrylic, PLA plastic, ytong, unsanded grout, and plaster.
Acrylic Nests
- Pros: Best visibility, mold-resistant, compact, and easy to clean.
- Cons: More expensive than other options; can be slippery for some ant species.
PLA Plastic Nests
- Pros: Durable, reusable, customizable with 3D printing, and mold-resistant.
- Cons: Requires access to a 3D printer for DIY designs.
Ytong (Autoclaved Aerated Concrete) Nests
- Pros: Excellent moisture retention and ventilation; mold-resistant.
- Cons: Heavy, difficult to carve, and less widely available.
Unsanded Grout Nests
- Pros: Good at holding moisture, mold-resistant, and long-lasting.
- Cons: Heavy and hard to clean.
Plaster Nests
- Pros: Inexpensive, easy to prepare and customize.
- Cons: Susceptible to mold, least durable, and hard to clean.
Choosing the Right Nest
Beginner Recommendation:
For first-time ant keepers, an acrylic nest is an excellent choice. It’s easy to set up, offers clear visibility, and is widely available.
Natural Setup Enthusiasts:
If you prefer a more natural habitat for your ants, go with a privacy nest using soil or sand. Just keep in mind that observation will be limited.
Avoid Gel Nests:
Although gel-based formicaria are marketed as beginner-friendly, they are not suitable for long-term ant keeping. The gel often contains harmful chemicals that can poison your ants.
Preventing Escapes
Ants are escape artists, so robust prevention measures are a must:
- Teflon Coating: Apply a thin layer inside the outworld walls, approximately 4 inches in width. This makes it slippery and prevents ants from climbing out. It works best in dry environments and it is effective for most ant species. You will need to reapply it every few months.
- Moats: Place your setup in a tray of water with a drop of oil to prevent evaporation.
- Vaselin: Less effective alternative to Teflon. Vaseline generally works for larger ants but not small ants. Some ants may lay debris to pave an escape path on the vaseline while some can just walk over it.
- Baby Powder & Alcohol Mix: Less effective alternative to Teflon. The particles on the wall will detach from the wall when the ants walk over it, causing the ants to fall. The baby powder/alcohol coating gets degraded every time an ant walks over it. You will need to reapply the coating at least every fortnight.
Always double up on escape prevention for peace of mind.
Transferring the Colony to Ant Farm
You can transfer your the queen ant out from the test tube into a formicarium once she has around 20 workers, or when the tube is too crowded (for big ant species).
To move your colony into the formicarium, simply place your test tube colony into the outworld. The colony will slowly move into the nest since it is darker inside.
If the ants refuse to go into the nest, try to keep your outworld bright, which will eventually force your ants to hide in the nest. Some formicaria have designs that allow you to easily transfer the ants. Keep the nest in the dark when transferring ants.
If your queen is not in the test tube (semi-claustral setup), place the container-containing the queen into the outworld. Flip the container gently so that the ants can easily leave the container. Obviously you need to remove the cover.
Be gentle when you are transferring your colony and try not to drop the ants to prevent unnecessary stress. If it is not possible to put your container into the outworld, prepare
Caring for Your Ant Colony
Now that your ants are settled, let’s keep them happy and healthy:
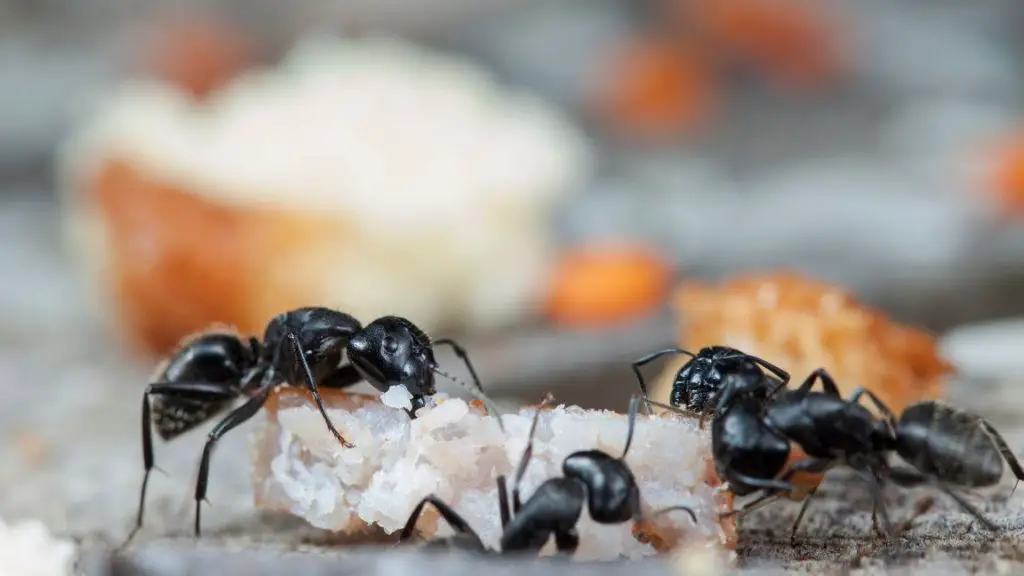
Feeding
Ants need a balanced diet:
- Protein: Dead insects, canned tuna, boiled egg yolk, or pet food.
- Sugar: 10% syrup or fruit slices.
Tips:
- Remove uneaten food daily to prevent mold.
- Adjust portions based on colony size and consumption.
Check out my ant-feeding guide for more details.
Maintaining Humidity and Temperature
Different species have different preferences, but in general:
- Humidity: Tropical species need higher humidity. Use a spray bottle or a formicarium with a built-in hydration system.
- Temperature: Use heat mats or cables for warmth but only in part of the nest, so ants can choose their comfort zone.
Lighting
Most ants prefer a dark nest but need some light in the outworld to mimic natural daylight. Use gentle lighting for 8 hours daily.
Leaving Your Ants When You’re Away
Going on vacation? No problem! Ants are low-maintenance:
- Add extra water and syrup tubes.
- Reapply escape barriers.
Recommended Supplies
Here’s a list of supplies to make your ant-keeping journey easier. (Affiliate links included to support this site at no extra cost to you.)
Final Thoughts
Ant keeping is an incredibly rewarding hobby that combines science, creativity, and patience. From catching your first queen to watching a bustling colony grow, the journey is nothing short of fascinating.
Whether you’re creating a DIY setup or investing in a high-tech formicarium, your ants will teach you lessons about teamwork, resilience, and the beauty of the natural world.
Ready to dive in? Start small, experiment, and enjoy the process—your colony awaits!