The greatest hassle a carnivorous-pet owner has is getting the feeder insects for his pet. In this article, I” teach you how to breed crickets for your pet mantis, tarantula, scorpion, and centipede.
To breed crickets, place them in an escape-proof, ventilated enclosure. Feed them vegetables and biscuits, and provide them with a water dish. To collect eggs, place a dish with 1″ of moist sand. The crickets will lay eggs inside the sand. You can either leave the eggs there or move it to a separate tank.
Breeding and maintaining a cricket colony is really easy, and you should really consider this if you are keeping a mantis, tarantula, scorpion or centipede. If you prefer to keep feeder roaches instead, I have another guide that you can refer to.
Why should I Breed Crickets?
Crickets are good source of proteins, fats, and numerous macronutrients. This makes them an ideal food source for carnivorous pets such as tarantulas, scorpions and centipedes.
While crickets are cheap, unless the pet store is very close to where you stay, you’ll need to pay for the transportation and spend the time traveling to get them. Even if it comes with free shipping, trust me, the shipping cost has already been factored into the selling price.
Online sellers usually sell crickets in bulk just to make the cost per cricket more appealing by spreading the shipping cost to each cricket. But often, you don’t need that many crickets if you are keeping say, only 1 adult tarantula.
Many of the crickets will die from aging (adult crickets can live for ~6 weeks) rather than becoming the food for your pet. If you can maintain a small colony of crickets on your own, there won’t be any waste.
Ultimately, maintaining a feeder cricket colony at home helps you to save money. It might also save you some time if you just need a small quantity of crickets.
Moreover, it is very easy to take care of a cricket colony. You should definitely try this if you are keeping a carnivorous pet
Buying Crickets
There are a few species of feeder crickets that you can get from the pet stores or breeders. Most of them come by the common name “house crickets”.
There is one thing that you need to check when buying the crickets: the size of the adult crickets. Certain species are slightly bigger than other species. Even for the same species, some breeders have selected their crickets where only bigger individuals are allowed to breed. This ensures the resulting brood is consistent in producing larger individuals.
It is also possible to buy cricket eggs from breeders. But, I recommend you start with a mixture of adult and juvenile crickets. In case the eggs fail to hatch, you can always get more eggs from the adult crickets. Moreover, you can feed your crickets to your pet while waiting for them to breed.
You might come across the name “pinhead cricket” in the pet stores. Those are simply younger house crickets. If your main intention is to breed the crickets, don’t buy pinhead crickets because they can’t breed yet.
Cricket Enclosure
Crickets need to be housed in a secure container so that they don’t escape. There are three important criteria here: security, ventilation, and size.
The enclosure must be secure enough that it is escape-proof. At the same time, it must have enough vents to make sure the enclosure is well-ventilated. Common critter housing with a mesh style lid would fit those 2 criteria.
Depending on how many crickets you need, you can use enclosures of different sizes. A 4 gallon enclosure can house around 200 medium size (~0.5″) crickets. Unless you are keeping 2 or more arthropods feeding on crickets, a 4 gal enclosure is typically more than enough.
If you are using a much bigger enclosure because you want to keep more crickets, apply a thin layer of vaseline, around 4-5″ in width along the upper, inner wall of your enclosure. This will help reduce the amount of crickets escaping when you open up the enclosure.
For smaller containers, the vaseline might not help much because the height of the container is rather low in the first place. The cricket can easily jump out without landing onto the slippery vaseline.
Technically, you can keep more crickets in a smaller enclosure but that will cause your crickets to have smaller size and promote cannibalism. It also makes it more difficult for you to handle them.
Lay a few pieces of newspaper at the bottom of your container. This will make cleaning work easier.
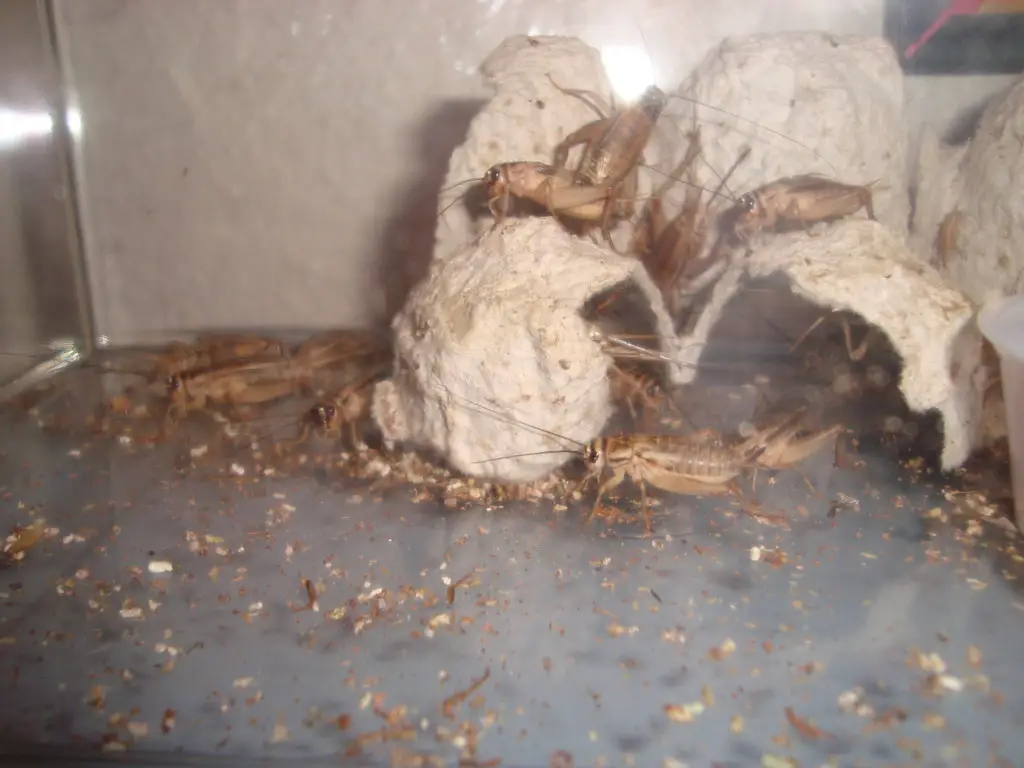
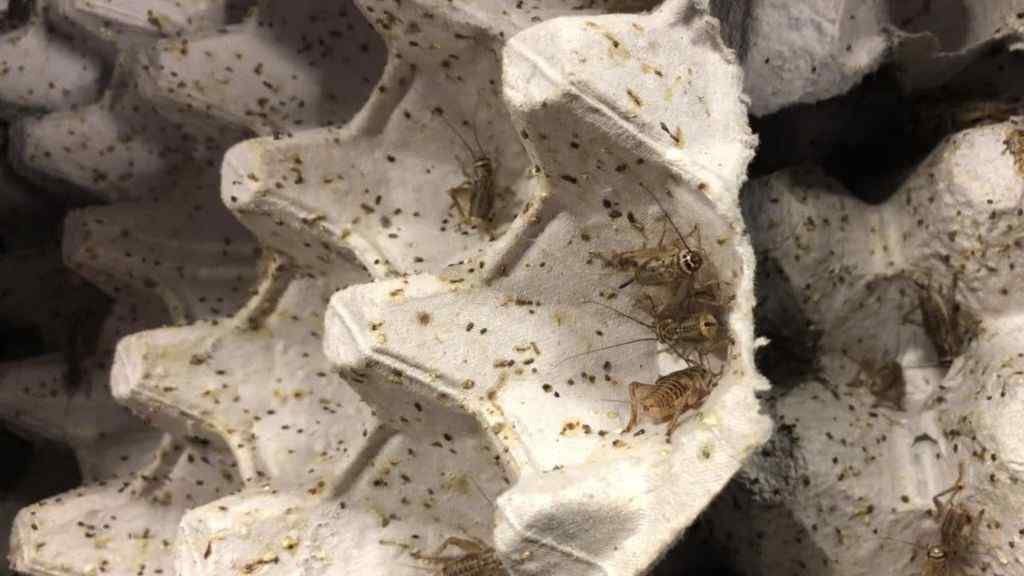
Put a few stacked egg cartons into the enclosure vertically. They serve as hiding places for the crickets to minimize cannibalism and death due to fighting. If you don’t have egg cartons, you can use any cardboards and fold them zig-zag.
Food for Crickets
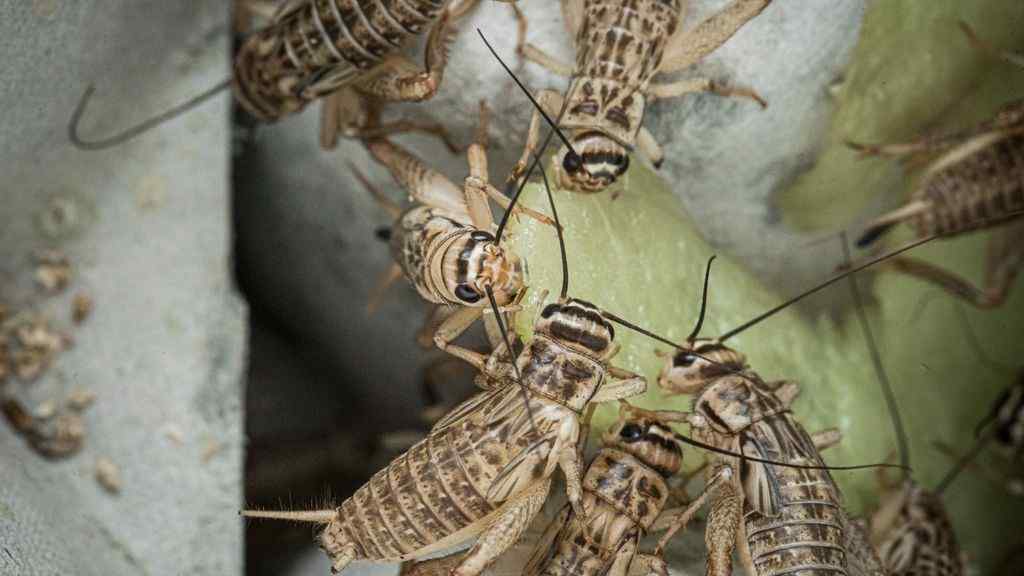
The easiest way to feed your crickets is by using commercially available cricket feed. This can be expensive in the long run though. Otherwise, you can use cut vegetables or fruits and grounded dog/cat biscuits.
The cricket population requires protein to flourish. 15-30% of their diet should consist of protein. Don’t give them too much protein though, because it will affect their well-being.
Try to use those vegetables or fruits with low water content such as carrot, cabbage, and apples. It will be messier if you use those with high water content such as watermelon or papaya.
Top up the food once they are fully consumed. The feeder crickets are omnivores. If there isn’t enough food provided, they will cannibalize each other.
Change the unconsumed wet food once every 2-3 days. It is easier to remove the food if you put them into a small dish.
Water
Crickets will obtain enough water from the vegetable or fruit. However, it is a good idea to provide them with a water dish to prevent death due to dehydration. Water dish is a must if you feed them only cricket feed.
Put a wet sponge in a water dish so that the crickets have something to drink. Without the sponge, the crickets may drown in the water. Change or wash the soap if it gets dirty. You can also put pebbles in the water dish instead of sponge so that the crickets can get out of the water.
Once every day or two, mist the enclosure to maintain a humid environment. Don’t overdo it though.
Temperature
Crickets can live between 68 – 95 °F (20 – 35 °C). Temperature control is not required if you can keep them within this range. If required, use a heat mat or light bulb to heat up the enclosure.
Like all other insects, the higher the temperature, the faster the growth rate.
Lighting
Crickets are nocturnal insects. They don’t require additional lighting.
Breeding Crickets
Now that you have completed the basic setup, you are ready to breed the crickets. Since you have bought a group of crickets, you should have both male and female crickets in your colony.
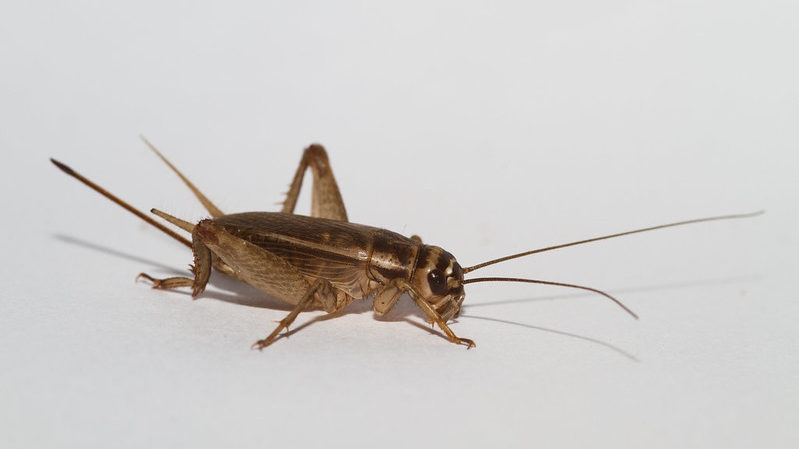
Look for the presence of adult male and female crickets. Adult crickets can be easily identified by the presence of wings. Female adults have a prominent, long ovipositor at the tip of their abdomen while male crickets don’t.
Once you are sure that you have both adult male and female crickets, you can start breeding them.
Prepare a small dish or tray and fill it with 0.5 – 1″ of either baked soil or sand. Add some water so that the substrates are moist but it shouldn’t be waterlogged.
Place the dish with substrates into the enclosure and let the crickets lay eggs inside. A female cricket can lay up to 200 eggs.
Then, you have 2 options:
- Leave the eggs with their parents
- Move the eggs to another enclosure
Leave the eggs inside the enclosure where the adults are housed
The advantage of doing so is time, space and cost saving. You don’t have to spend extra time taking care of the eggs and resulting brood separately. You don’t need a space for an extra enclosure, and you don’t need to spend extra money to buy that enclosure in the first place.
However, there are some disadvantages as well. First, some or worse, all of the eggs or newly hatched crickets may become the snacks of the older crickets. This will directly impact your breeding plan.
Second, it is difficult to collect or separate crickets of different ages. As a result, you might be wasting the crickets where some older crickets are left to die while you are feeding your pet with younger crickets of similar sizes.
I recommend you to use this method if you just need 4-6 crickets a week. If you choose this option, you just need to mist the substrates from time to time to keep it moist so that the crickets can always lay eggs inside.
Move the eggs into a separate enclosure
The advantages of moving the eggs into a separate enclosure are obvious. You have a higher hatch rate and survivability while ensuring all crickets of similar ages are housed together. This method is recommended if you need 10 or more crickets per week.
The disadvantages are, of course, an additional budget for the extra enclosure, additional space for the enclosure, and extra time required to take care of them.
Here is what you need to do if you decided to keep the eggs in a separate enclosure:
Replace the egg-laying substrates with a fresh one after 7 days. Move the old substrates containing eggs into another escape-proof enclosure with vents. Let’s call this enclosure A for clarity sake.
Keep the eggs warmer between 86 – 95 °F (30 – 35 °C) if possible. The eggs will hatch in 1 to 2 weeks under such temperature. Room temperature is also acceptable but it will take a longer time for the eggs to hatch. Mist the enclosure daily to keep it humid.
Continue to replace the egg-laying substrates in the parent enclosure every 7 days and move the new eggs into enclosure A. Stop putting new substrates if you think there are too many eggs to handle.
14 days after the first batch of crickets emerged in enclosure A, move all eggs into yet another enclosure, let’s call it B. All new eggs should move to enclosure B until the first batch of crickets in enclosure B is 14 days old. Then, all new eggs should be moved to enclosure C and so on. The crickets in either enclosure A, B, or C can be used as the parents for subsequent generations.
Note that 14 days is a flexible time frame. You can adjust according to the number of eggs hatched within that period of time vs the size of your enclosure, as well as the number of enclosures you want to maintain.
The amount of crickets hatched within the first few days is probably lesser. It might take 14 days (or less) to reach the max capacity of the enclosure. But the second enclosure (B) would likely reach its max capacity faster so you can shorten the days the eggs stay in enclosure B before transferring to C.
If you think there are just too many enclosures for you to handle, you can just stop at enclosure B by letting the eggs stay for a longer period in the same container. You can even stop at enclosure A. It’s up to you.

Keeping Track of the Generations
It is good to keep track of the generations of your crickets. The parental generations are called the F0, and resulting offspring are called the F1. Offspring of F1 are called F2 and so on.
At every 5 generations or so, introduce a batch of new crickets into the breeding pool to diversify the genetics. This will ensure your cricket population flourish.
Taking Care of the Juvenile Crickets
Newly born crickets are very tiny and fragile. Caring for juveniles is the same as caring for adults except for water supply.
Small crickets can easily drown in the water dish and even water droplets. To prevent this, put a wet towel into the enclosure so that the crickets can obtain water from the towel.
It takes about 2-3 months for the juveniles to turn into adults. You will need some planning, calculation and trial and error to maintain a consistent cricket supply for your pet.
Cleaning the Cricket Enclosure
You should clean the cricket enclosure once every 2 weeks, depending on the density of the crickets. Remove the carcasses and clean the droppings to prevent molds and diseases. Wash the enclosure with mild detergent and let it dry. If the cardboards are too dirty, replace them.
How to Deal with Population Explosion
Sometimes we might miscalculate the population growth. If you overestimated the growth, the worst case is buying more crickets. If you underestimate the growth, you will have too many eggs or crickets than you can handle. What can you do?
Competition
You can let competitions kick in to regulate the population size. It sounds cruel but limiting the food supply and space will encourage cannibalism, which leads to slower population growth. It also causes the overall size of your crickets to become smaller because they spend a lot of energy competing.
Growth Hack – Temperature
While you can’t stop the time, you can accelerate or delay the growth of your population by controlling the rearing temperature.
Crickets can survive from 68 – 95 °F (20 – 35 °C). If you keep them at the lower end of this temperature range, their growth will be slowed down. They will eat less food and take longer to mature.
On the other hand, if you keep them at the higher end of that temperature range, they grow much faster. Bear in mind that the faster they grow, the smaller is their overall size.
Sell or Gift Them Out
If you have way too many crickets than you need. Don’t kill them. Give them to other hobbyists or sell them for some pocket money.
Recommended Supplies
Here are the things that I recommend you to get for your breeding project. Note that I get a small commission when you buy the items through the links in this page. This helps me to maintain the site without incurring additional costs to you.
Final Words
By now you should have learned how to maintain a feeder cricket colony at home. I hope this is useful and you have enjoyed reading this article. Remember to check out my other articles on keeping carnivorous arthropods such as mantis, tarantula, scorpion, and even centipede.